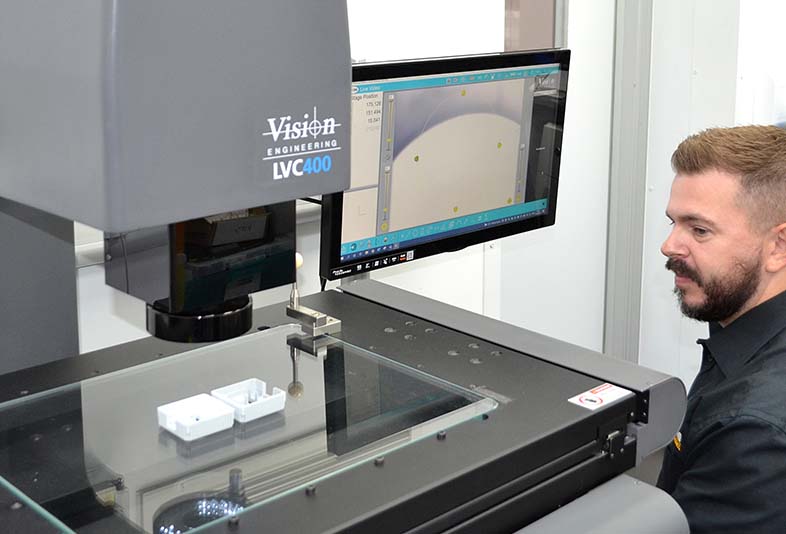
In this case study Nordell Ltd discuss how LVC400 accurate and repeatable measurement routines enable staff to keep pace with the high volume of injection molded parts passing through their QC department.
Based in West Sussex, United Kingdom, Nordell Ltd. is a world-class injection molding and manufacturing company that has over 50 years of in-depth technical experience.
Nordell’s modern injection molding facility houses 38 highly efficient molding machines with a capacity of up to 380T.
The company, recognized for its specialist, technical expertise, offers flexible manufacturing solutions to its customers, allowing medium to high volume production on a 24/5 basis in batch sizes of over 1 million parts if required.
Complementary Services
In addition to first-class injection molding and product assembly facilities the company offers a range of complementary services, including an ISO Class 7 cleanroom, toolmaking and maintenance, an inhouse build and assembly department for customer’s, bespoke product build (including ultrasonic welding & printing), plus full product testing and quality assurance.
As well as technical manufacturing services the company also offers a range of logistics and replenishment options including DLF Direct Line Feed and Kanban systems.
Reputation for quality
Given the ISO9001 and ISO14001 accredited business’ reputation for quality and precision, Nordell serves a global customer base operating across a range of demanding sectors, including the medical, automotive and the oil and gas industries. To ensure that it retains its hard-won reputation for quality, Nordell provides its skilled quality assurance staff with first-class tools.
Introducing LVC400
The latest addition to the company’s quality department is a recently installed Vision Engineering LVC400 3-axis video measurement system.
In addition to delivering outstanding levels of precision the fully automated, CNC system now provides the ease and speed of use that enables Nordell’s staff to keep pace with the flow of parts passing through the company’s busy QC department.

Why LVC400?
Explaining the reason behind LVC400’s purchase, Nordell Technical Director Paul Rowe said:
“Previously, although our staff were using a wide range of accurate inspection equipment, because of the dissimilar operating systems and different operator’s ‘feel’, occasionally they would achieve slightly different readings.
Quality is central to Nordell’s business philosophy, therefore, to ensure we were able to guarantee highly precise, repeatable measurements, without the technique of the instrument or the user being factors, we undertook a search for suitably accurate and repeatable automated measuring system.
“In addition to precision being a major consideration, given the large volumes of parts we manufacture, we looked for a CNC instrument that would significantly improve the speed and efficiency of our part inspection routines.
Also, as many of the parts we produce are deformable, ‘contact’ measuring approaches are not ideal, therefore, the proposed new system needed to use a non-contact inspection method.
Having considered the offerings from several major metrology manufacturers,
“an in-depth demonstration of LVC400 by the staff of Vision Engineering, convinced us that the advanced 3-axis video measurement system was the ideal answer to our needs.
Following its installation and operator training, as LVC400’s operating system is extremely logical, our staff quickly understood the system’s capabilities and soon became highly proficient in its use.
Fast, accurate measurements
“Our Vision Engineering LVC400 machine now allows us to very accurately and quickly check the critical measurements on some of the most complex parts that we produce and to ensure that we always manufacture parts to our customers’ exact specifications.
Our LVC400 measuring machine uses an advanced non-contact optical system for component inspection and provides accuracy measured in microns.
Typically, we use LVC400 to inspect small lightweight components with challenging, high-accuracy specifications.
Measuring multiple small components
“In addition to providing the levels of precision that we need, LVC400’s large stage makes it ideal for speeding up the measurement of multiple smaller components.
Now, our operators simply choose the relevant inspection program, load a batch of parts onto the machine and measure them in a single, fully automated inspection routine. We are also able to generate comprehensive inspection reports.”
Applications in the plastics industry
Vision Engineering has decades of experience in supplying the global plastic industry with accurate, measurement and inspection systems.
In addition to the company’s high-magnification instruments being ideal for performing visual checks for imperfections, they are able to accurately and quickly measure the critical features of plastic parts.
Vision Engineering’s instruments are also employed throughout the plastic industry for checking mold tools and extrusion dies for the signs of wear and damage that may affect the quality of the final product.
Designed for versatility
LVC400 fully automated 3-axis measuring system, as purchased by Nordell Ltd, has the ability and versatility to meet the needs of demanding manufacturing environments. With a range of 400mm x 300mm x 200mm, the advanced CNC system is ideal for accurately measuring single large components, or large batches of smaller parts.
Built on a robust granite base to provide outstanding stability, LVC400 features a high resolution 5MP USB3 camera and a high-precision X-Y stage, making it Vision Engineering’s most accurate, large format measuring system to date.
Ideal for a wide range of applications
Thanks to LVC400’s multiple functions, the innovative 3-axis video measurement system is the ideal solution for a wide range of measurement applications.
The system is used across the world in areas such as precision engineering, plastic molding, electronics, and in the manufacture of medical devices. To complement LVC 400’s advanced measuring capabilities, optional touch probes are available, making it easier to measure complex features and 3D forms.
Powerful software
Providing advanced functionality and comprehensive reporting capabilities, LVC400 uses the industry standard M3 Series software, which is powerful, yet easy to operate.
Software highlights include feature measurements and constructions with geometric tolerancing, programmable illumination and advanced edge detection.
In addition to DXF import/export functionality and direct data transfer to Excel, further useful functions include stitching and pallet programs, a multi-feature finder tool, a thread measurement option and formula results via a calculation feature.
“We are thrilled with the performance of our LVC series of automated multi-sensor measurement systems and with the positive feedback that we have been receiving from our customers since its launch. Our metrology solutions are renowned for offering excellent value and LVC has taken this further by providing advanced functionality at an affordable price point.”


