Automotive manufacturers rely on consumer confidence in their brands to remain successful in highly competitive markets. Understanding that safety and reliability are key elements of their reputation, they require their parts manufacturers to demonstrate adherence to stringent quality control procedures.
This is particularly important when it comes to electronic components. Even a minor imperfection will cause engine failure and, as components are so small, it is challenging and time-consuming for mechanics to isolate the fault.
Therefore, automotive manufacturers are particularly careful when selecting preferred suppliers, insisting on a fail-safe supply of reliable electronic components that consistently deliver performance on demand.
Maintaining quality and customer reputation
In order to maintain a reputation for quality and reliability, automotive electronics manufacturers constantly review their Standard Operation Procedures.
As part of this they adjust electronics quality control protocols where required, improving both quality and efficiency. This process includes evaluating inspection equipment fitness for purpose and upgrading inspection systems when necessary.
This commitment to constant improvement ensures both the supplier and the automotive OEMs maintain their reputation for reliability and excellence.
A real-life example
A global electronics manufacturer supplies ESCU (Electric Steering Control Unit) components to a number of high-end motorbike manufacturers. In order to ensure these parts are completely reliable, they conduct 100% manual visual inspection (MVI) checks of the printed circuit boards and the wire harness connections contained within the ESCU. Only then are the components dispatched to their customers.
The ESCU inspection process
As mentioned earlier every single PCB undergoes inspection before packaging for dispatch. One of the key areas checked for issues is the wire harness joints on the PCBs. Any issues in this area would immediately affect functioning, making the 2-wheeler unreliable at best and unsafe at worst. To this end, great care is taken to ensure all joints are 100% secure.
Operators check that wires have been stripped correctly prior to insertion into the connector and that the wire is sufficiently retained and fully seated in the v-notches.
They also check the connector body to ensure there is no damage and look for any broken retaining barbs.
Finally, they check the joints connecting the wire harness to the PCB for correct positioning and steadfastness, making sure contact is free from any defects.
Established quality control inspection methods
When inspecting the ESCU components for the 2-wheelers the manufacturer was using bench magnifiers to help identify faults.
Although bench magnifiers allowed for a better view than the naked eye, operators could not always distinguish fine details, leading to a higher rejection rate than was necessary. The reporting process was also time-consuming, as operators were unable to provide images as part of the documentation.
Assessing the quality control inspection process
During a routine assessment of electronics manufacturing procedures, the Quality Control (QC) Manager and inspection team highlighted some areas for improvement. It was agreed that incorporating methods to reduce rejection rates and simplifying record-keeping would greatly enhance the process.
As a starting point to improving the process, the QC Manager agreed to replace the bench magnifiers with equipment that offered higher magnification, together with the option to capture images.
Several options were investigated as it was important, not only to select the best product for the updated process but to also select a system that would accommodate future amendments to quality assurance protocols.
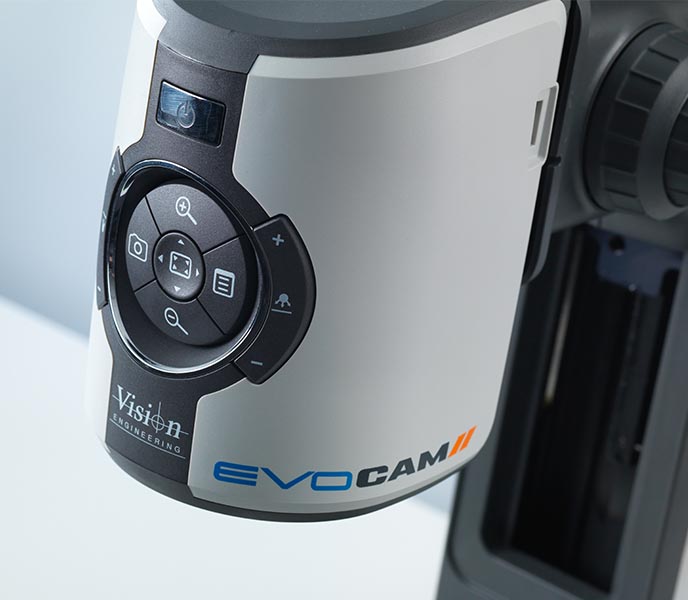
After testing a short list of products, the QC Manager opted for Vision Engineering’s EVO Cam II digital microscope.

Benefits of the digital inspection system
The ability to view connections and solder joints at increased magnification, together with excellent image clarity, has noticeably improved the speed and accuracy of inspection. This reduction in inspection time and rejection rates have definitely had a positive impact on the bottom line.
The option to capture images at the touch of a button has made collaboration far easier. If an operator is unsure about anything, they simply share the image with their supervisor for clarification. If necessary, the image can be included in a report for quality control records.
Future-proofing for updated quality control protocols
When purchasing EVO Cam II the QC Manager appreciated that the digital inspection system must keep pace with any amendments to electronics quality control protocols.
The lens options and range of accessories gave him the confidence that EVO Cam II would meet the future needs of the inspection team. In addition, the ability to incorporate annotation and on-screen measurement software should the need arise, would ensure detailed checks and reporting would be possible if required.
The updating of quality assurance processes and the resulting purchase of EVO Cam II has helped this client to improve throughput whilst maintaining the exceptional quality they are known for.
If you are looking to improve your inspection processes get in touch to see how we can help you to make a positive difference.


